Origami Bee Instructions
Follow these 10 simple steps to fold your origami bee.
Want to receive cool localization content straight to your inbox?
Get a free subscription, and we’ll send you updates on upcoming expert panels, interesting articles and more every month.
Fold your origami bee

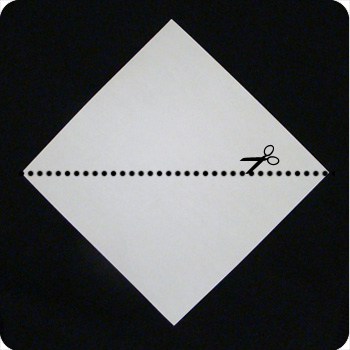
Step 1
Take a yellow, square sheet of paper and cut it along the diagonal so it becomes a triangle.
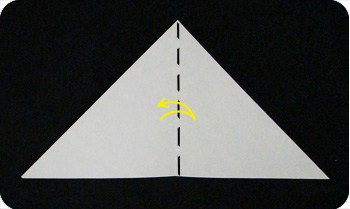
Step 2
With the white-side facing up, fold the paper in half and unfold.
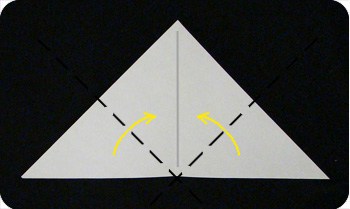
Step 3
Fold up the bottom-corners so the tips meet at the peak of the triangle.
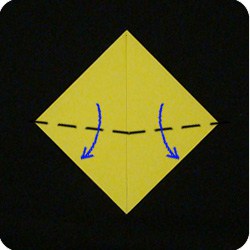
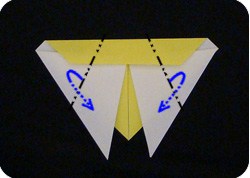
Step 4
Fold down the two flaps but fold it at a slight angle so the tips spread apart from one another and look like wings.
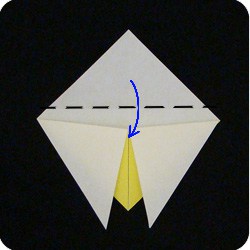
Step 5
Fold down the back-layer of paper. Don’t fold exactly in half; instead, leave a small gap.
Unfold.
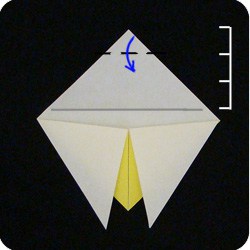
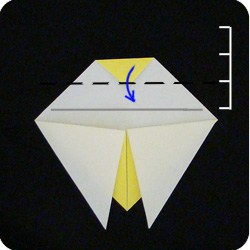
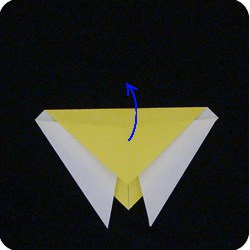
Step 6
Make the back-layer more narrow by folding it into thirds. Then refold the crease made in step 5.
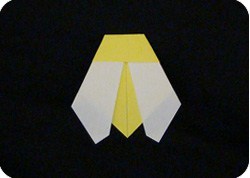
Step 7
Fold back (mountain fold) a good portion of the left and right sides of the model. Adjust the paper until the shape is of that of a bee and that the left and right sides are symmetrical to one anoher. Press down to establish the folds.

Step 8
Fold back the wing tips.
Step 9
Swing by the Wordbee booth to grab a black pen. Color the bee’s head black and color stripes across its back.
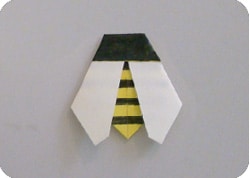
Step 10
Done! Tweet your beautiful bees to @Wordbee