New QA Issue Resolver Module added to WBT
Wordbee Translator already comes with a dedicated, powerful QA that has a large set of linguistic checks, including dates, numbers, forbidden terms, markups, leading/trailing spaces, translation consistency, text length, etc. Basically, it detects errors in translation by comparing source and target segments.
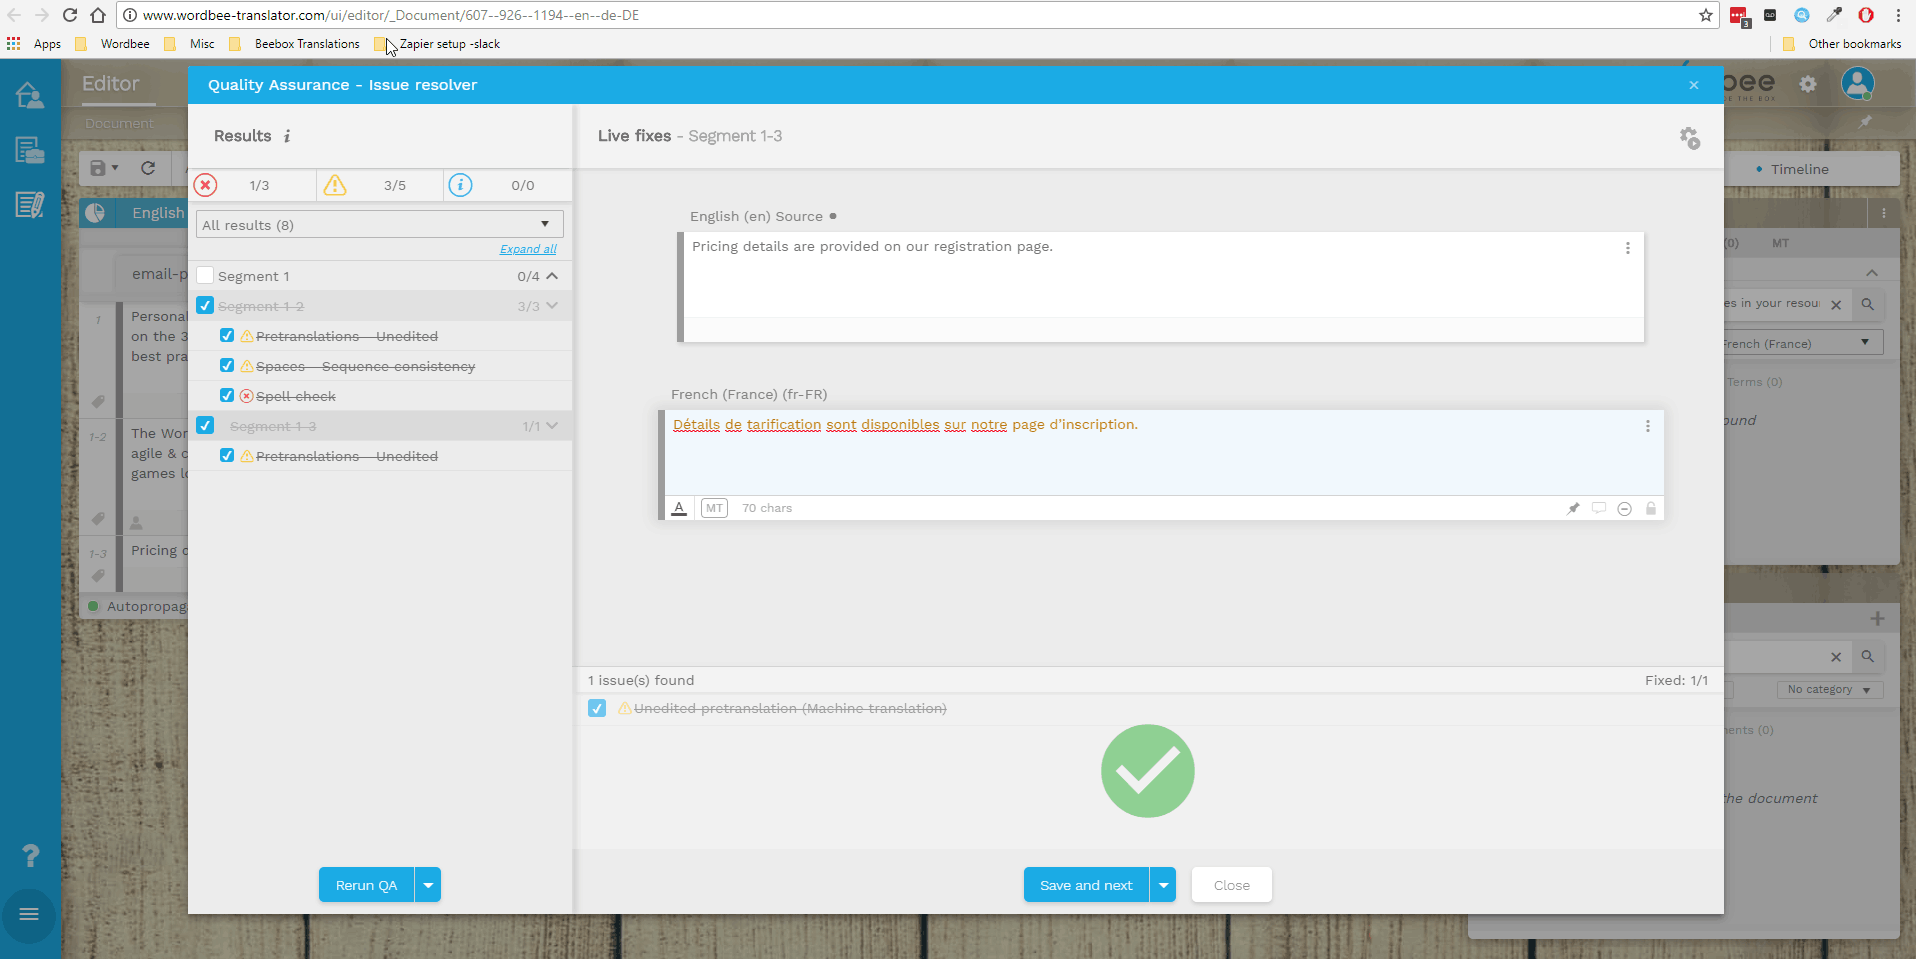
But with the help of the new QA Issue Resolver, you can focus on translation segments with QA issues in a dedicated space and fix them in the same window with minimal interaction.
The new add-on also includes a couple of enhancements to general QA tasks. For instance, the “forbidden terms” rule specifies which forbidden terms were found, and the Smart Assistant feature correctly identifies character classes for full-width characters.
Benefits using the new QA Issue Resolver add-on:
1. Drastically reduce QA process time
Imagine how much less time you could spend on QA checks if you could fix errors as you go and validate the status of your segment with an additional action. You wouldn’t need to click on each segment to display all errors, or navigate through pages and pages to make sure all issues had been fixed before validating your segments. Now it’s all possible in just one go!
2. Helps you to concentrate on your initial QA task
The QA Issue Resolver helps you keep a better overview of your original project tasks. By running the “Issue Resolver” from the very beginning, you can see how many errors have been detected and fix them in your translated document in one single window.
How does it work?
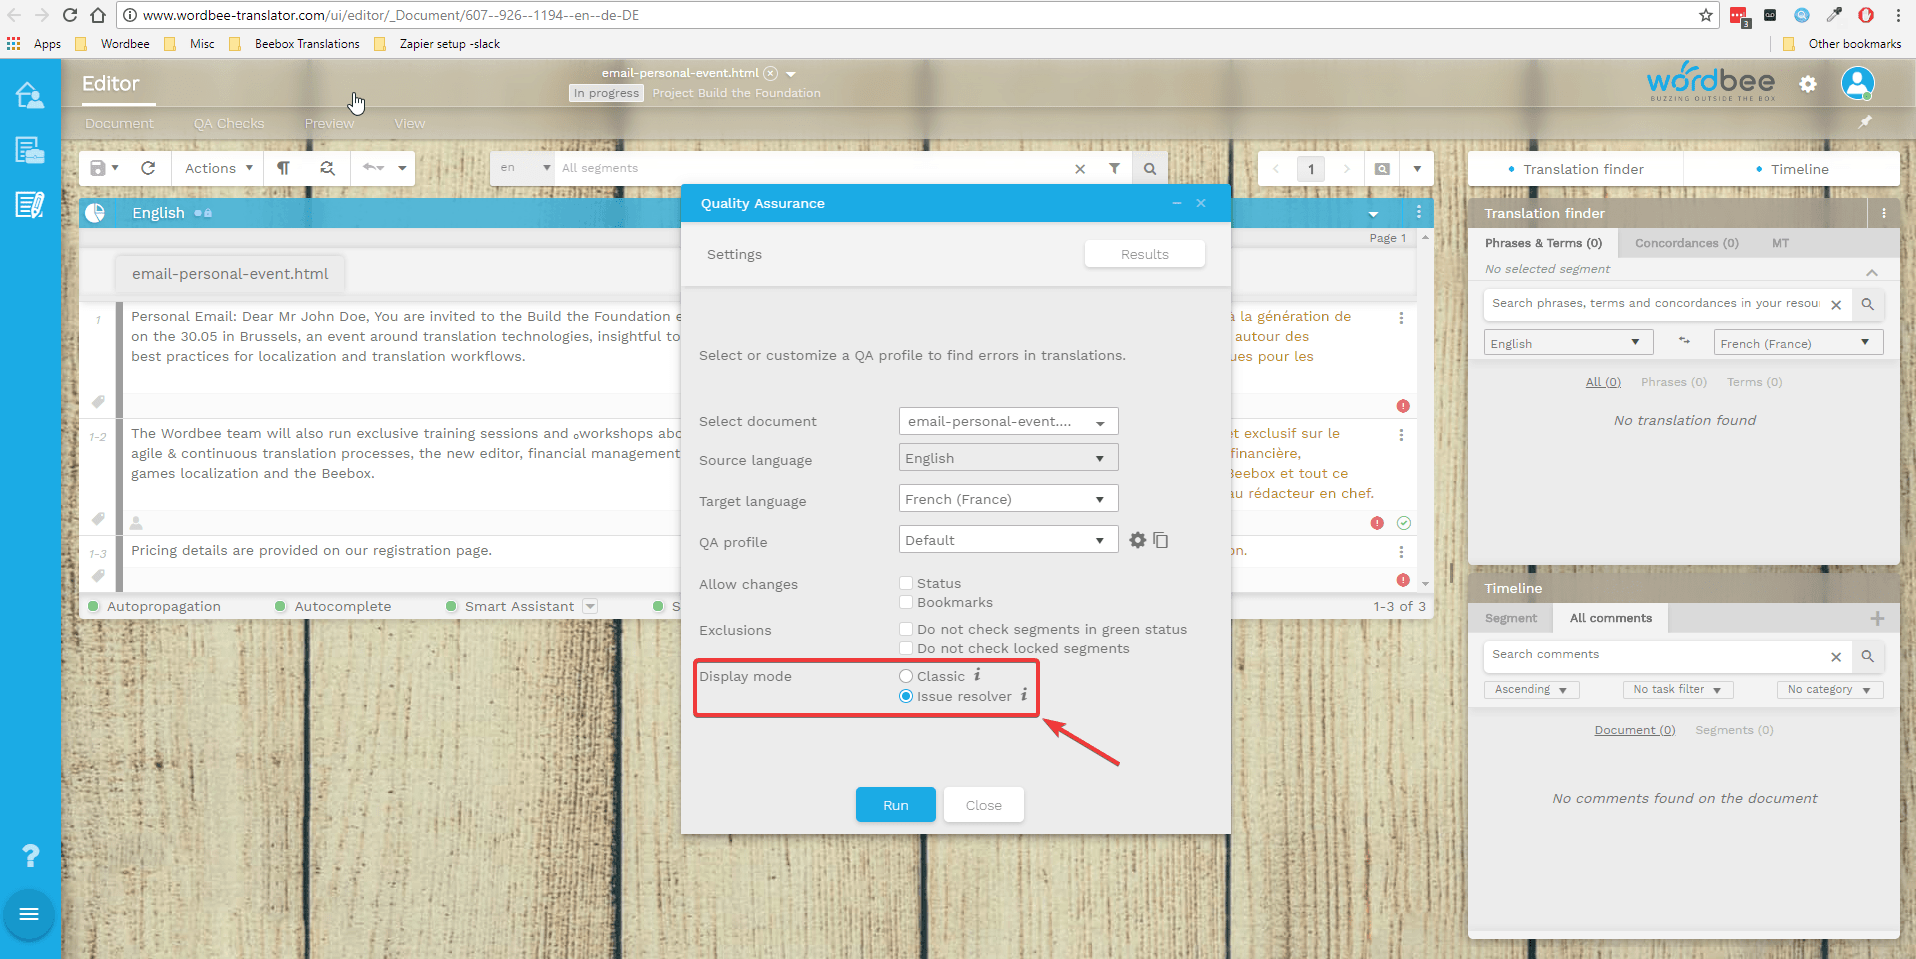
The QA Issue Resolver is embedded in the QA checks feature on the New Editor. Before using the new add-on, you’ll need to set up and run a QA check on your document.
Clicking on the “Run QA/QA Results” link will open a pop-up window that allows you to configure some parameters before starting the QA process. You can now to display your results directly in the classic QA results list or in the new Issue Resolver screen.
This gives you the advantage of displaying results in a single interface, allowing advanced issue-resolving. If at any point you need to toggle from the classic view to the advanced one, you can do it with the arrow next to “Rerun QA.” Once you’ve fixed all of the issues in a segment, you can trigger additional actions to validate the status of your segment or apply a bookmark for future reference.
Additional details:
Please visit our dedicated user guide page on how to use the QA Issue Resolver.
Last but not least, you can register here for the upcoming character limitation webinar on June 4th, 5:00pm - 6:00pm CEST.
Is this interesting?
Subscribe to get interesting localization podcasts, discussion panels, and articles every month.


